Journal/Care Basics · 7 min read
How to Repot an Orchid (Without Killing It)
Repot a phalaenopsis orchid step by step: the signs it's time, bark vs moss, trimming dead roots, what to do with aerial roots, and aftercare.
Quick answer
Repot an orchid every 1–2 years, ideally just after flowering, when the bark has broken down or roots are circling and spilling out. Use fresh orchid bark (not potting soil), trim dead brown roots with sterilised scissors, keep aerial roots above the surface, and pot it snugly — one size up at most.
Repotting is the orchid job people put off the longest, and the one their orchid needs most. Shop phalaenopsis usually arrive crammed into sphagnum moss inside a plastic sleeve pot, and two years later the medium has decayed into a soggy sponge that suffocates the roots — the slow-motion cause of most "my orchid suddenly died" stories. The operation itself takes fifteen minutes, and orchids tolerate it far better than their delicate reputation suggests. Here's exactly when and how, focused on the moth orchid (Phalaenopsis) but valid for most bark-grown orchids.
When to repot
- Every 1–2 years: bark breaks down on that schedule; decayed bark holds water like a sponge and roots rot.
- Right after a flowering cycle ends is the ideal moment, or when you see fresh green root tips — the plant re-establishes fastest while making new roots. Avoid repotting in full bloom unless roots are rotting; it usually costs you the flowers.
- Sooner, regardless of timing, if: the medium stays wet for a week+, smells sour, or has turned crumbly and soil-like; roots inside the pot are brown and mushy; or the plant rocks loosely in decayed medium.
Roots wandering out of the pot into the air, on their own, are NOT a reason to repot — aerial roots are normal phalaenopsis behaviour.
What you need
- Fresh orchid bark mix (fir/pine bark, often with perlite and charcoal). Not standard potting soil — it suffocates orchid roots. Pure sphagnum only for very dry homes and experienced waterers.
- A clear pot with drainage holes, the same size or one size up (2–3 cm wider). Orchids flower best slightly root-bound; an oversized pot stays wet and rots roots.
- Scissors or snips sterilised in flame or with rubbing alcohol — orchid viruses and bacterial rots spread on dirty blades.
Soak the fresh bark in warm water for an hour (or overnight) while you work — pre-moistened bark settles better and wicks evenly afterwards.
Step by step
- Water the orchid a day before — hydrated roots are flexible instead of brittle.
- Squeeze the pot gently and slide the plant out. Tease away ALL the old medium, including moss packed in the root centre — this old core is the usual rot culprit.
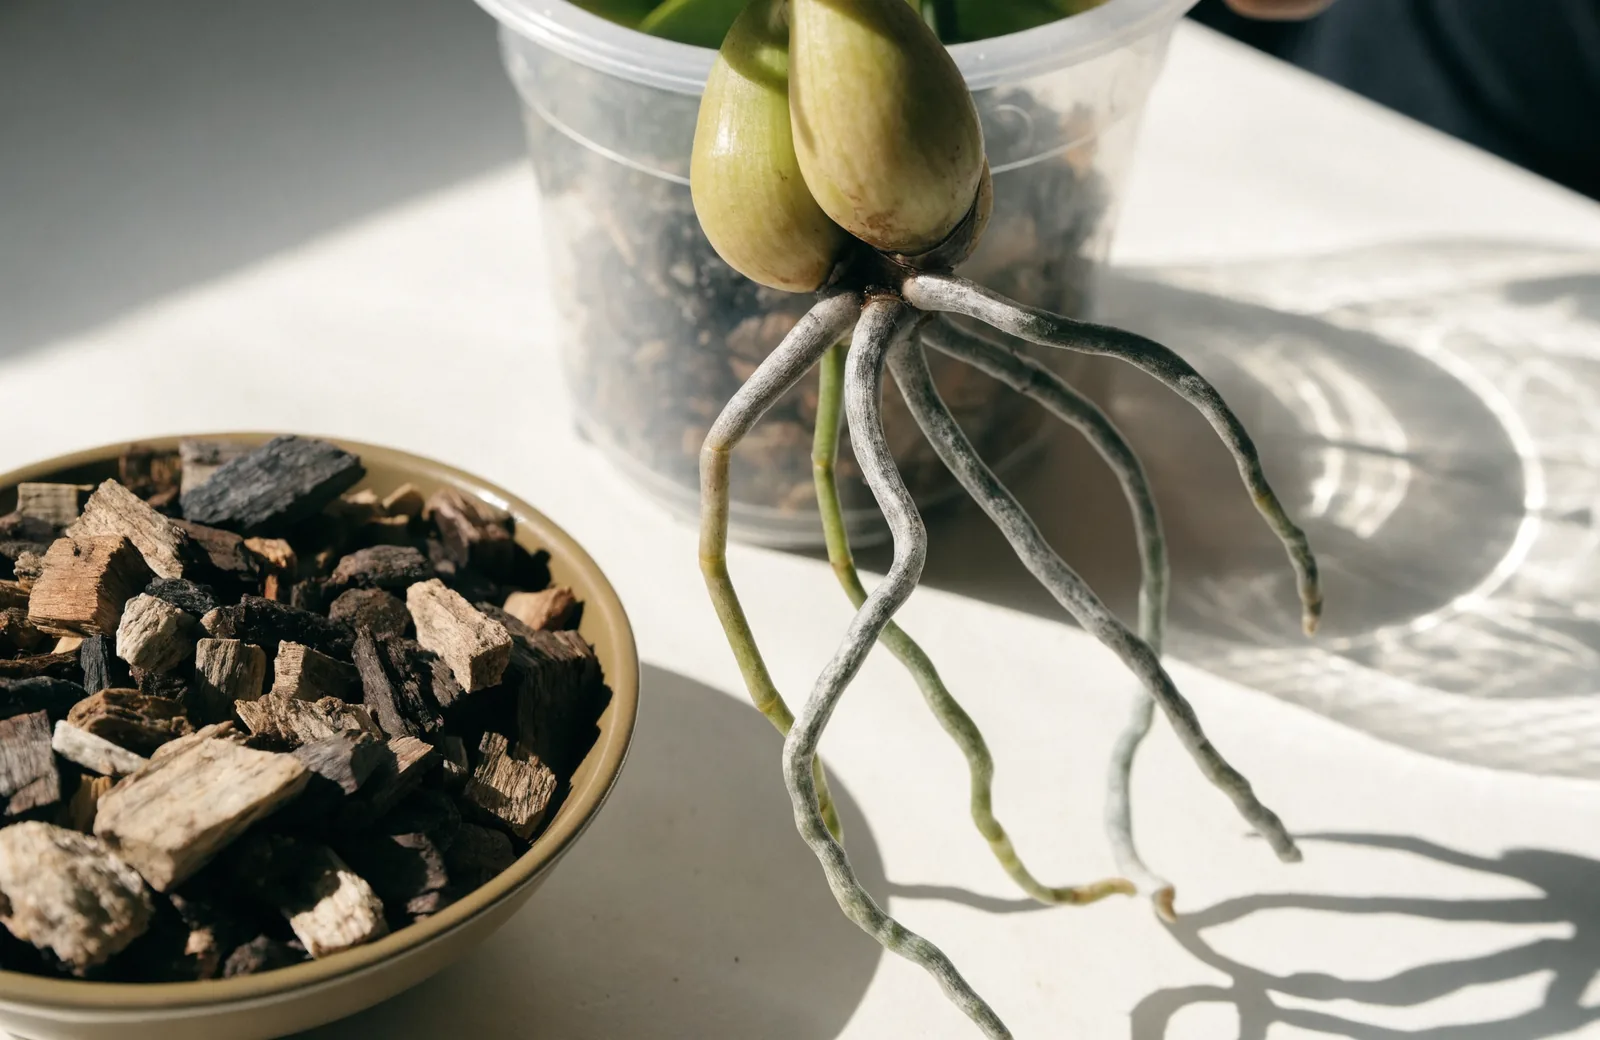
- Rinse the roots and inspect: healthy roots are firm, silvery-green (bright green when wet); dead ones are brown, hollow or mushy, and the outer layer slides off leaving a thread.
- Cut every dead root back to firm tissue with your sterilised scissors. Removing half the root mass looks brutal and is completely routine. Trim spent flower spikes at the base too.
- Set the plant in the pot with the base of the lowest leaf just below the rim. Pour in bark around the roots, tapping the pot and wiggling gently so pieces settle into the gaps — firm enough that the plant doesn't wobble. Leave aerial roots above the surface; forcing them under usually rots them.
- Don't bury the crown — the junction of leaves and roots must sit at, not under, the surface.
Tip: a wobbly orchid never roots in. If it still rocks after potting, anchor it to a stake for the first couple of months — stability is what lets new roots grip.
Aftercare
Water thoroughly once after potting, then hold off for about a week so any cut roots can callus, and keep the plant out of direct sun in a bright spot with good humidity. Resume normal watering (roughly weekly, when roots turn silvery) and half-strength feeding after 2–3 weeks. A slight sulk — a limp lower leaf or a paused flower spike — is normal for a few weeks. New root tips are your confirmation that the repot worked.
Not sure whether those roots are dead or just dry? The PlantMe app's plant doctor can tell from a photo — it recognises rot, dehydration and sunburn among 500+ problems and walks you through the fix.
Frequently asked questions
When is the best time to repot an orchid?
Just after flowering, when new green root tips appear — for many phalaenopsis that's spring or early summer, but any time works if the medium has broken down or roots are rotting.
Can I use regular potting soil for orchids?
No. Phalaenopsis roots need air; soil compacts around them and they drown. Use orchid bark mix, or high-quality long-fibre sphagnum if you know how to manage its moisture.
Should I cut off aerial roots when repotting?
No — leave healthy aerial roots alone, outside the pot. Only remove ones that are clearly dead (brown, papery or mushy). Cutting healthy roots costs the plant energy and invites infection.
My orchid's roots fill the pot — does it need a bigger one?
Only slightly. Orchids like being snug, and a pot much wider than the root ball holds stale moisture. Go up 2–3 cm at most, or keep the same pot with fresh bark.
Do I water an orchid right after repotting?
Water once to settle the bark, then wait about a week before resuming a normal routine, so trimmed roots can heal.
About the author

Plant Science & Curiosities
Lena is a botanist who thinks the strangest thing about plants is how rarely we ask why they do what they do. She covers the science side of the Journal — photosynthesis, plant communication, disease biology — translating research into things you can actually use at the potting bench.
Try it yourself
Diagnose it instantly with PlantMe
Snap a photo of any plant or leaf. Get the species, the diagnosis, and a care plan in seconds.
Download on theApp Store